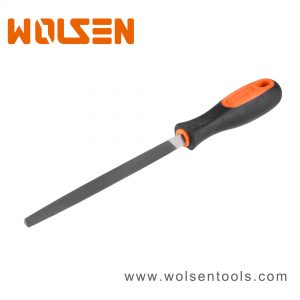
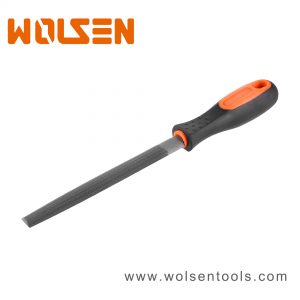
Flat File
Item No.: 3201
Material: T12 Special Tool Steel
Handles: Two-component Plastic Handle
Packaging: Pastic Hanger
| ITEM NO. | SIZE | QTY./CARTON |
| Rough (Bastard Cut) | ||
| 3201104 | 4″ | 240 |
| 3201106 | 6″ | 180 |
| 3201108 | 8″ | 120 |
| 3201110 | 10″ | 72 |
| 3201112 | 12″ | 36 |
| 3201114 | 14″ | 24 |
| Middle (Second Cut) | ||
| 3201204 | 4″ | 240 |
| 3201206 | 6″ | 180 |
| 3201208 | 8″ | 120 |
| 3201210 | 10″ | 72 |
| 3201212 | 12″ | 36 |
| 3201214 | 14″ | 24 |
| Fine (Smooth Cut) | ||
| 3201304 | 4″ | 240 |
| 3201306 | 6″ | 180 |
| 3201308 | 8″ | 120 |
| 3201310 | 10″ | 72 |
| 3201312 | 12″ | 36 |
| 3201314 | 14″ | 24 |
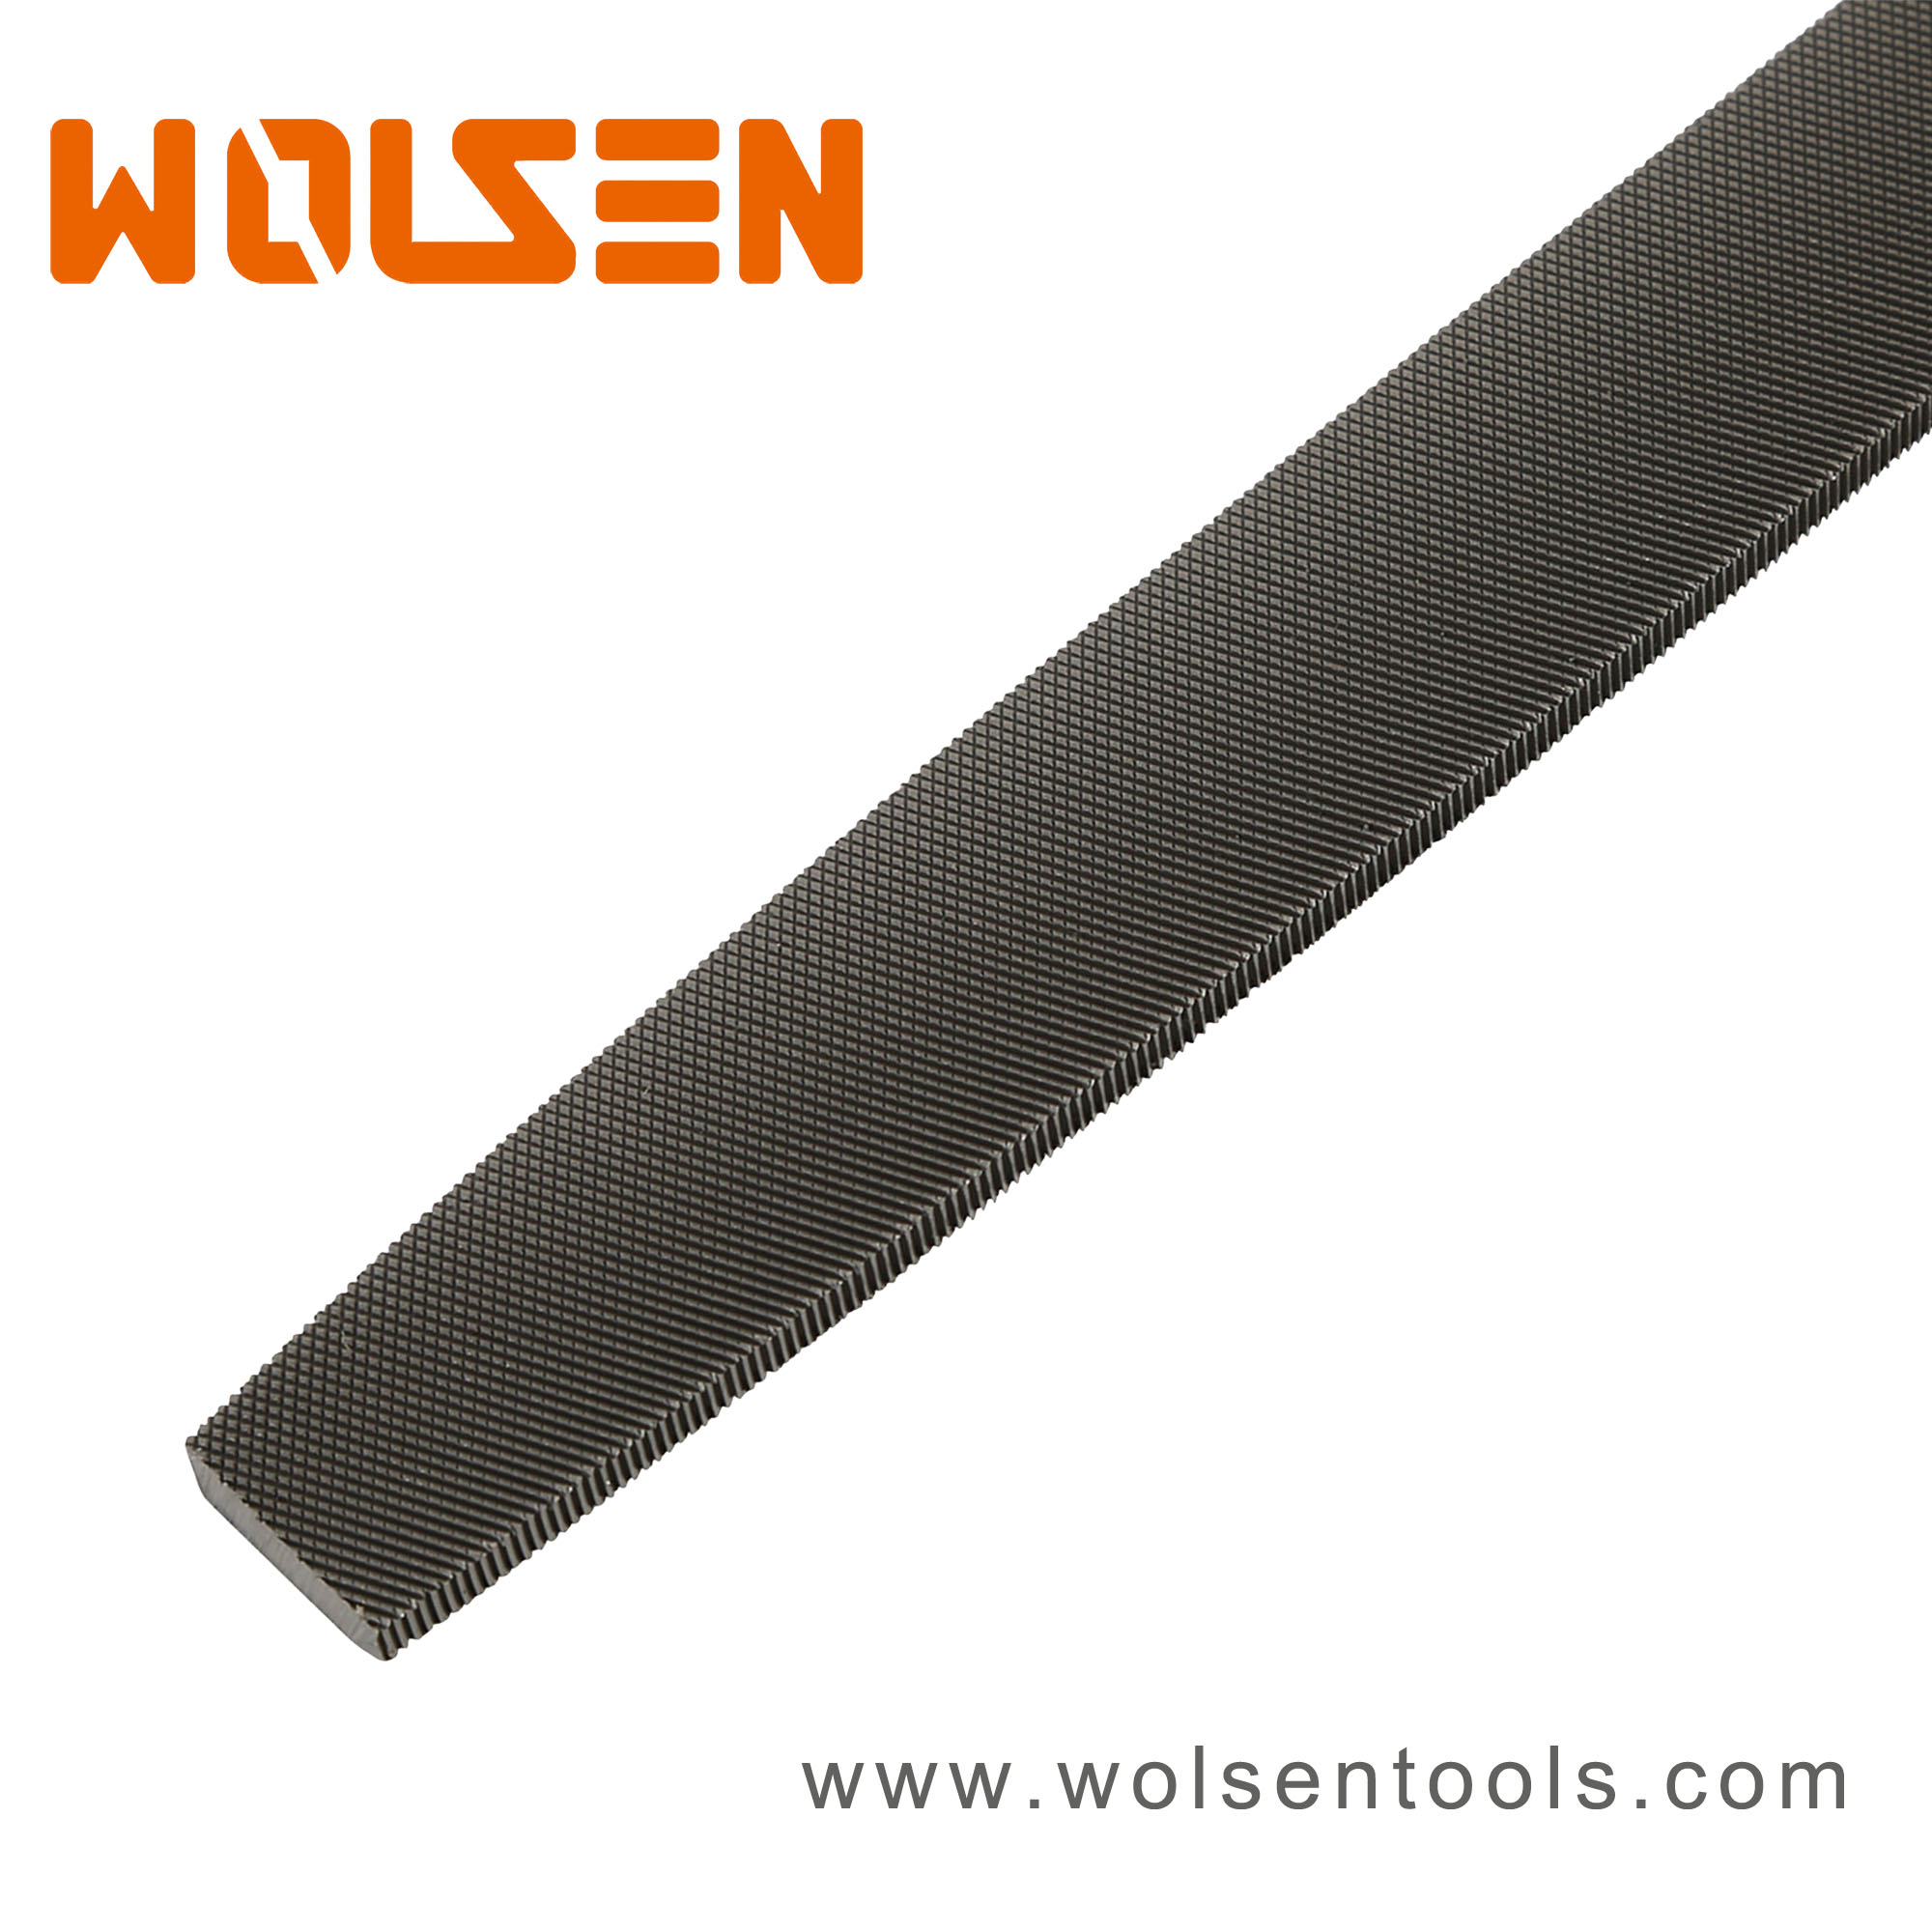
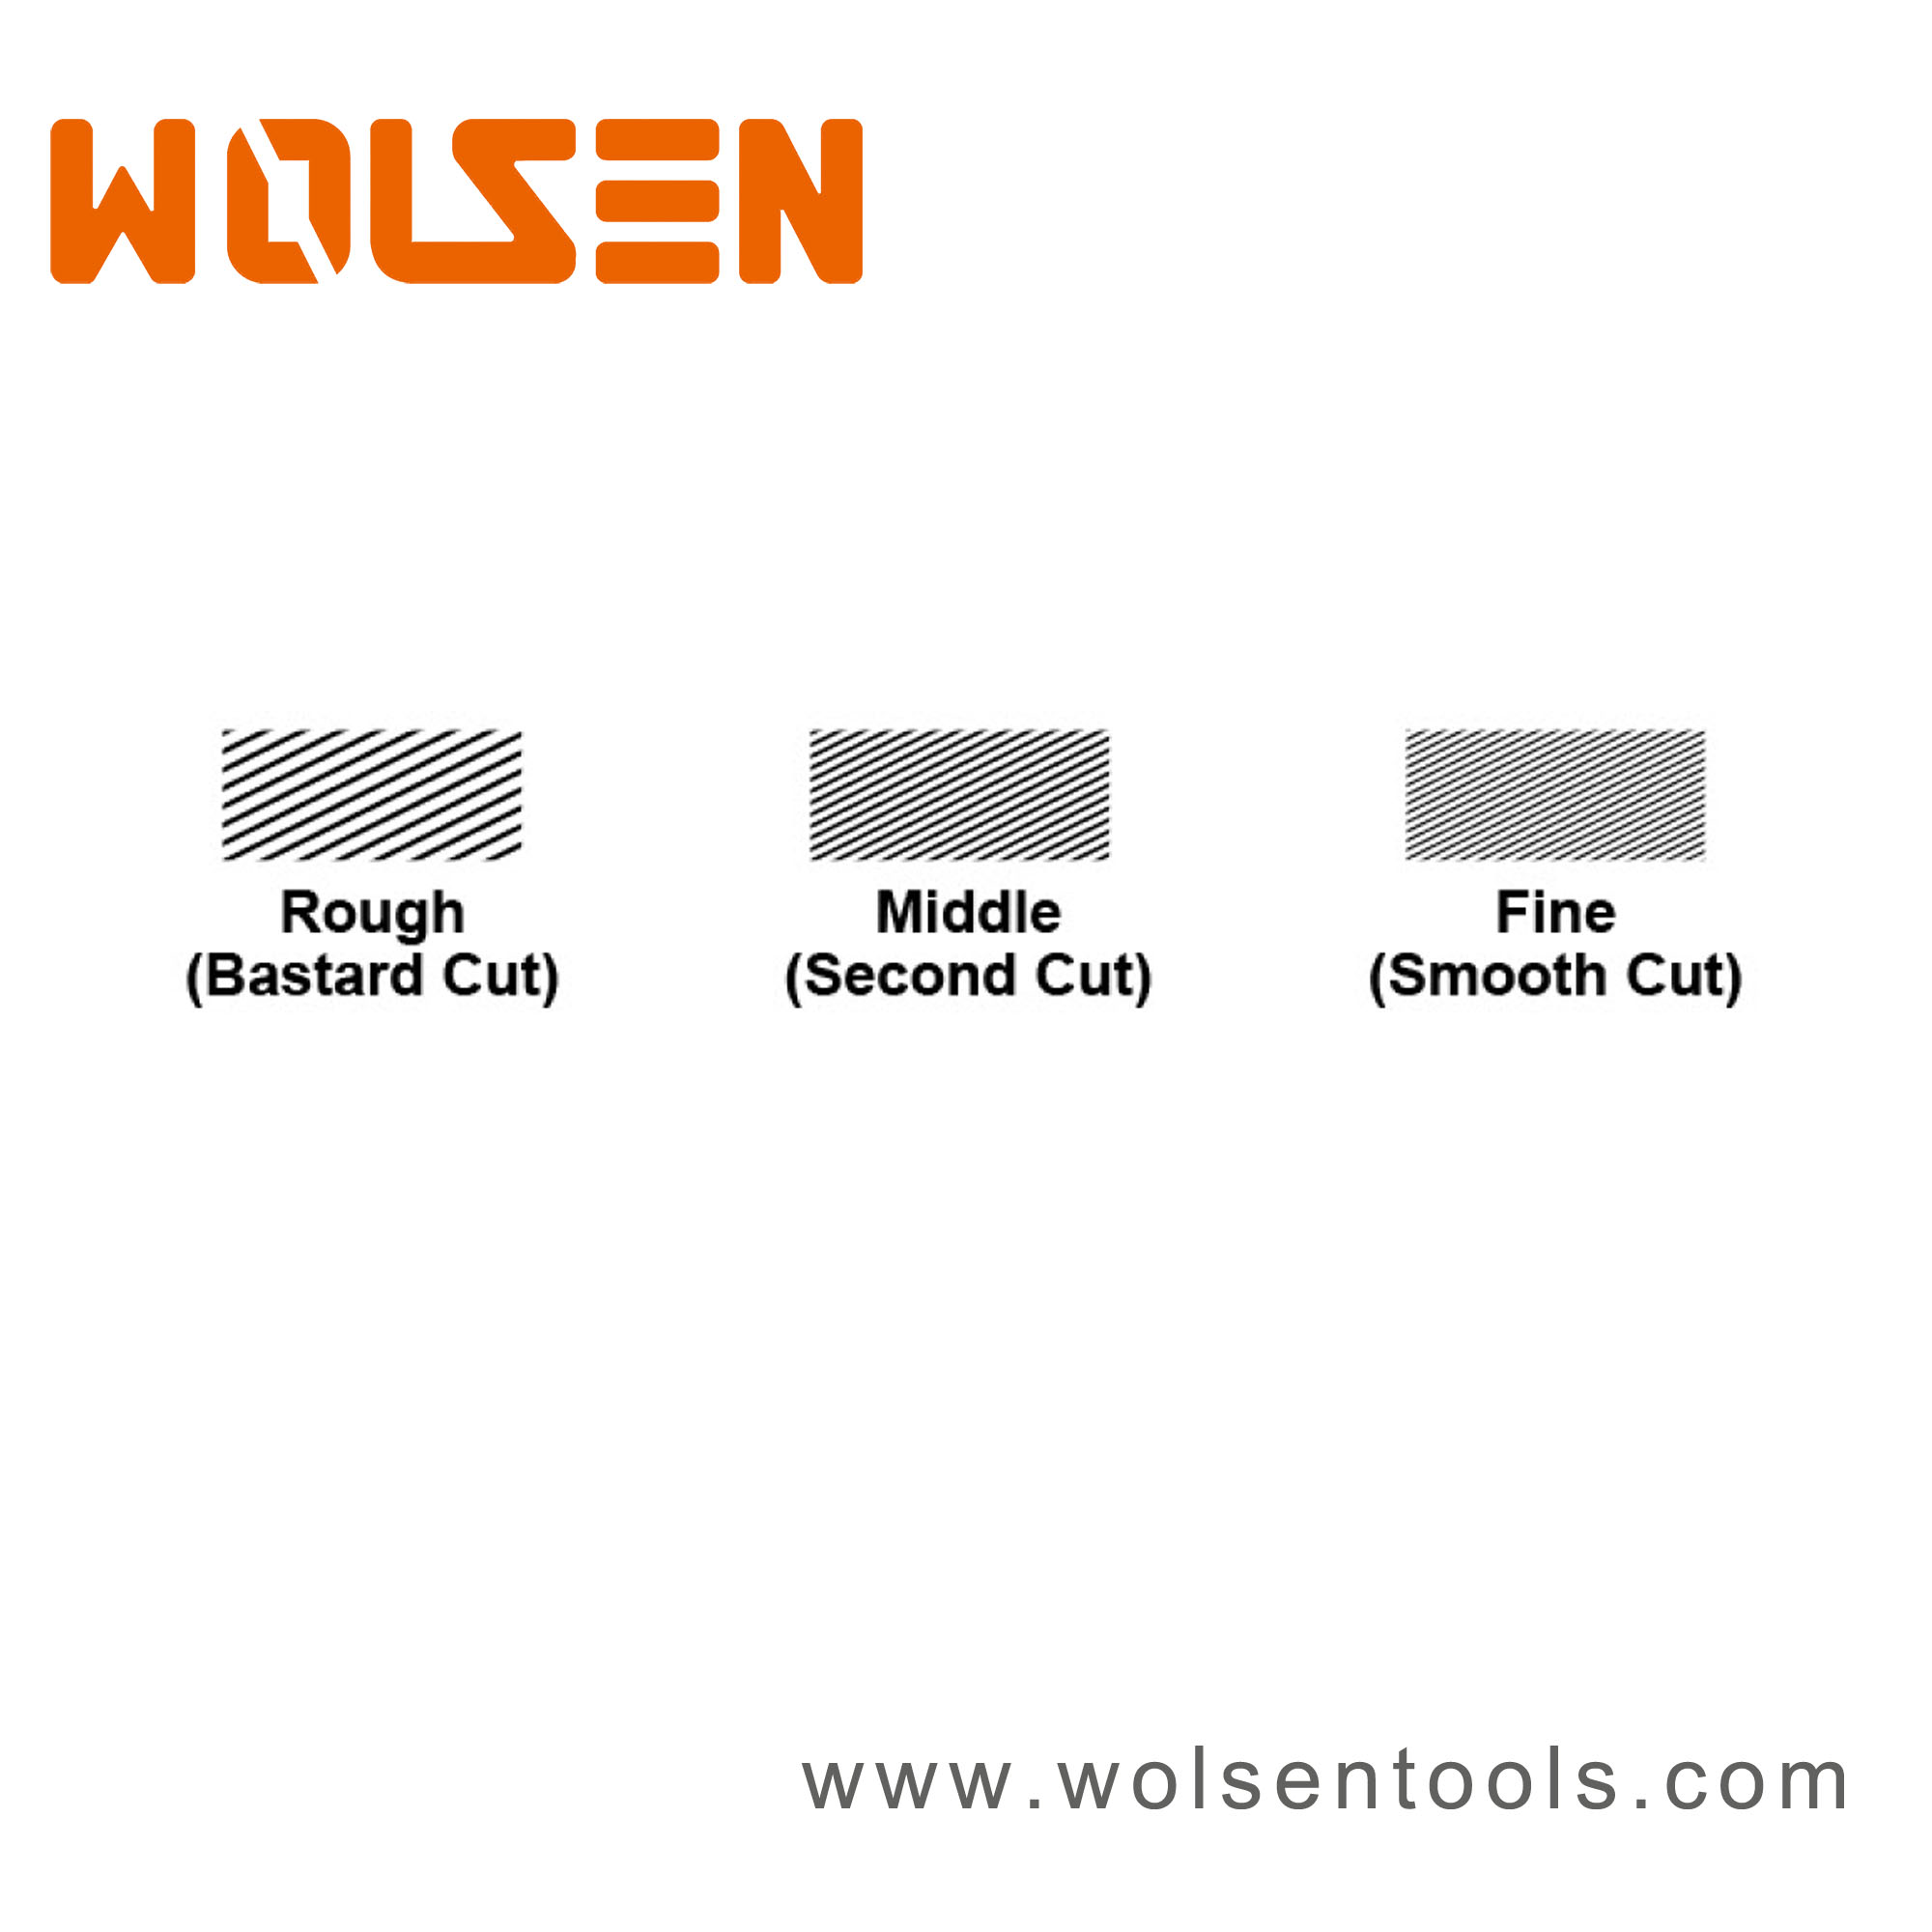
Metal File’s Cut Types
- Work to accomplished, roughing or finishing, will determine type of teeth and coareness for each application.
- Most American pattern files are available with 3 grades of cut: bastard-cut, second-cut and smooth-cut
- The degree of coareness is greater in long files, but differences between bastard, second and smooth are proportionate.
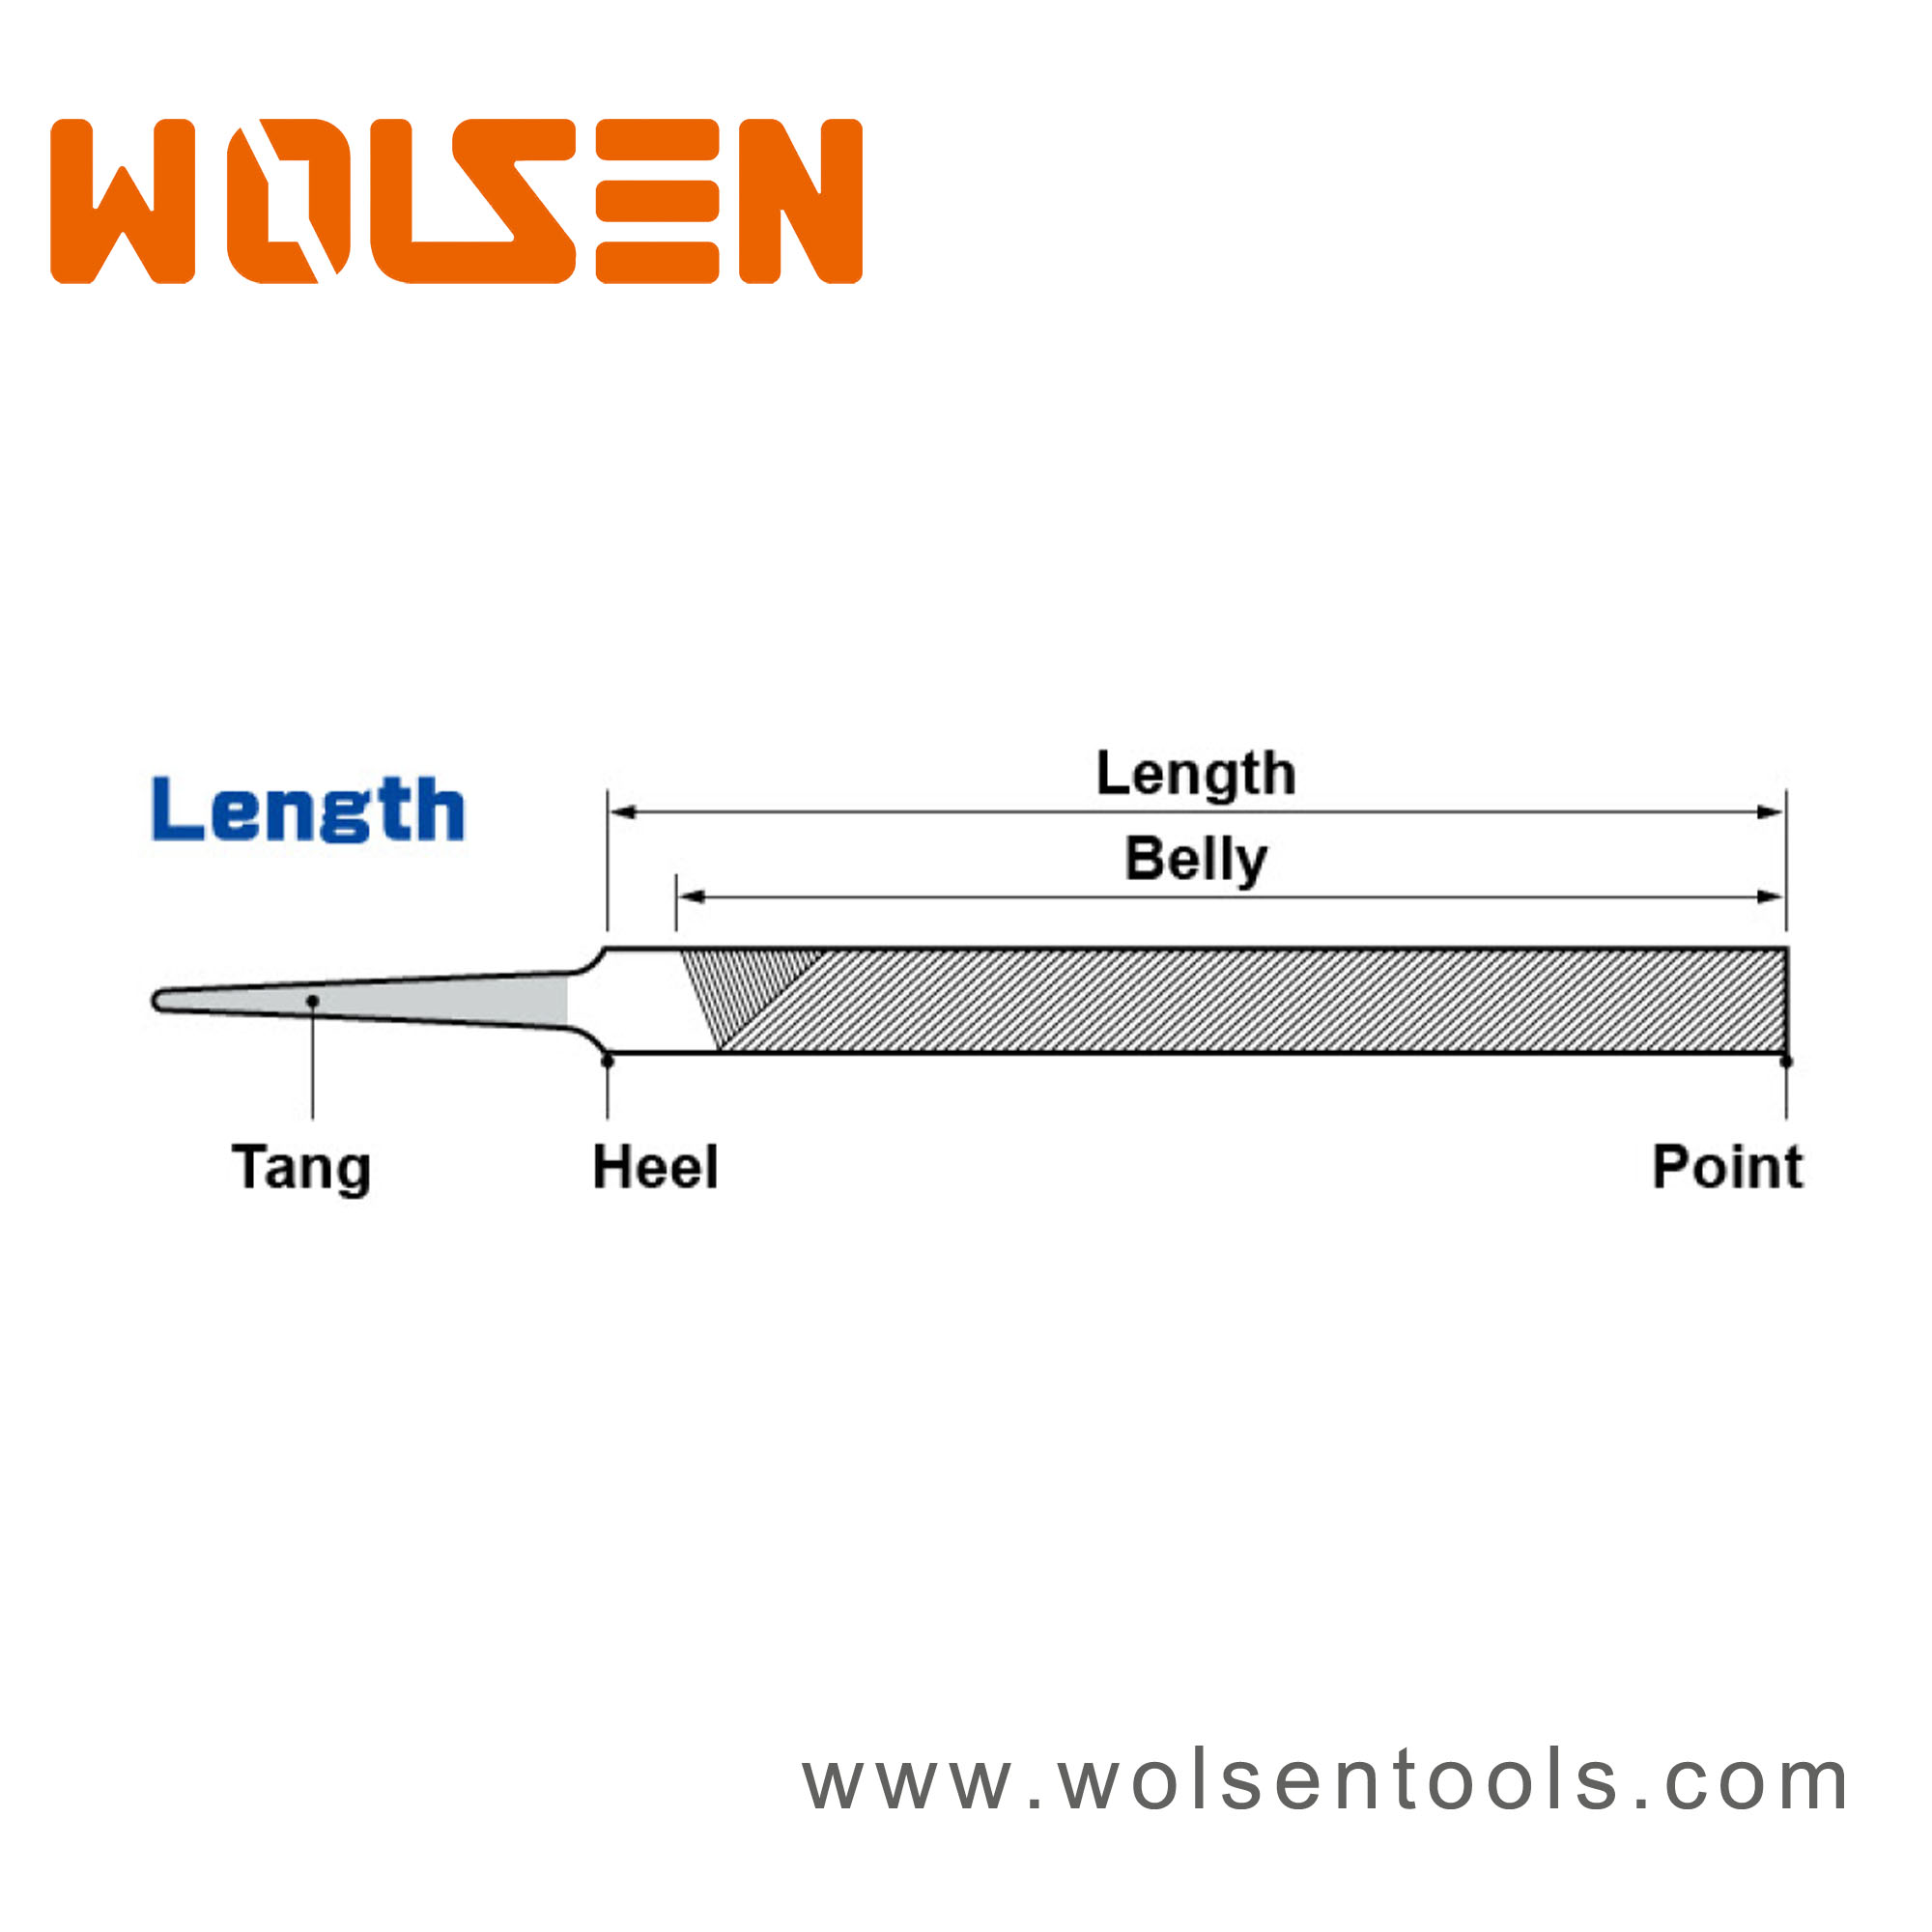
- Length is measured exclusive of tang, from point to heel, unless specified otherwise.
- Desired stroke length, type of material and size will determine length required.
Metal File’s Sharp Types
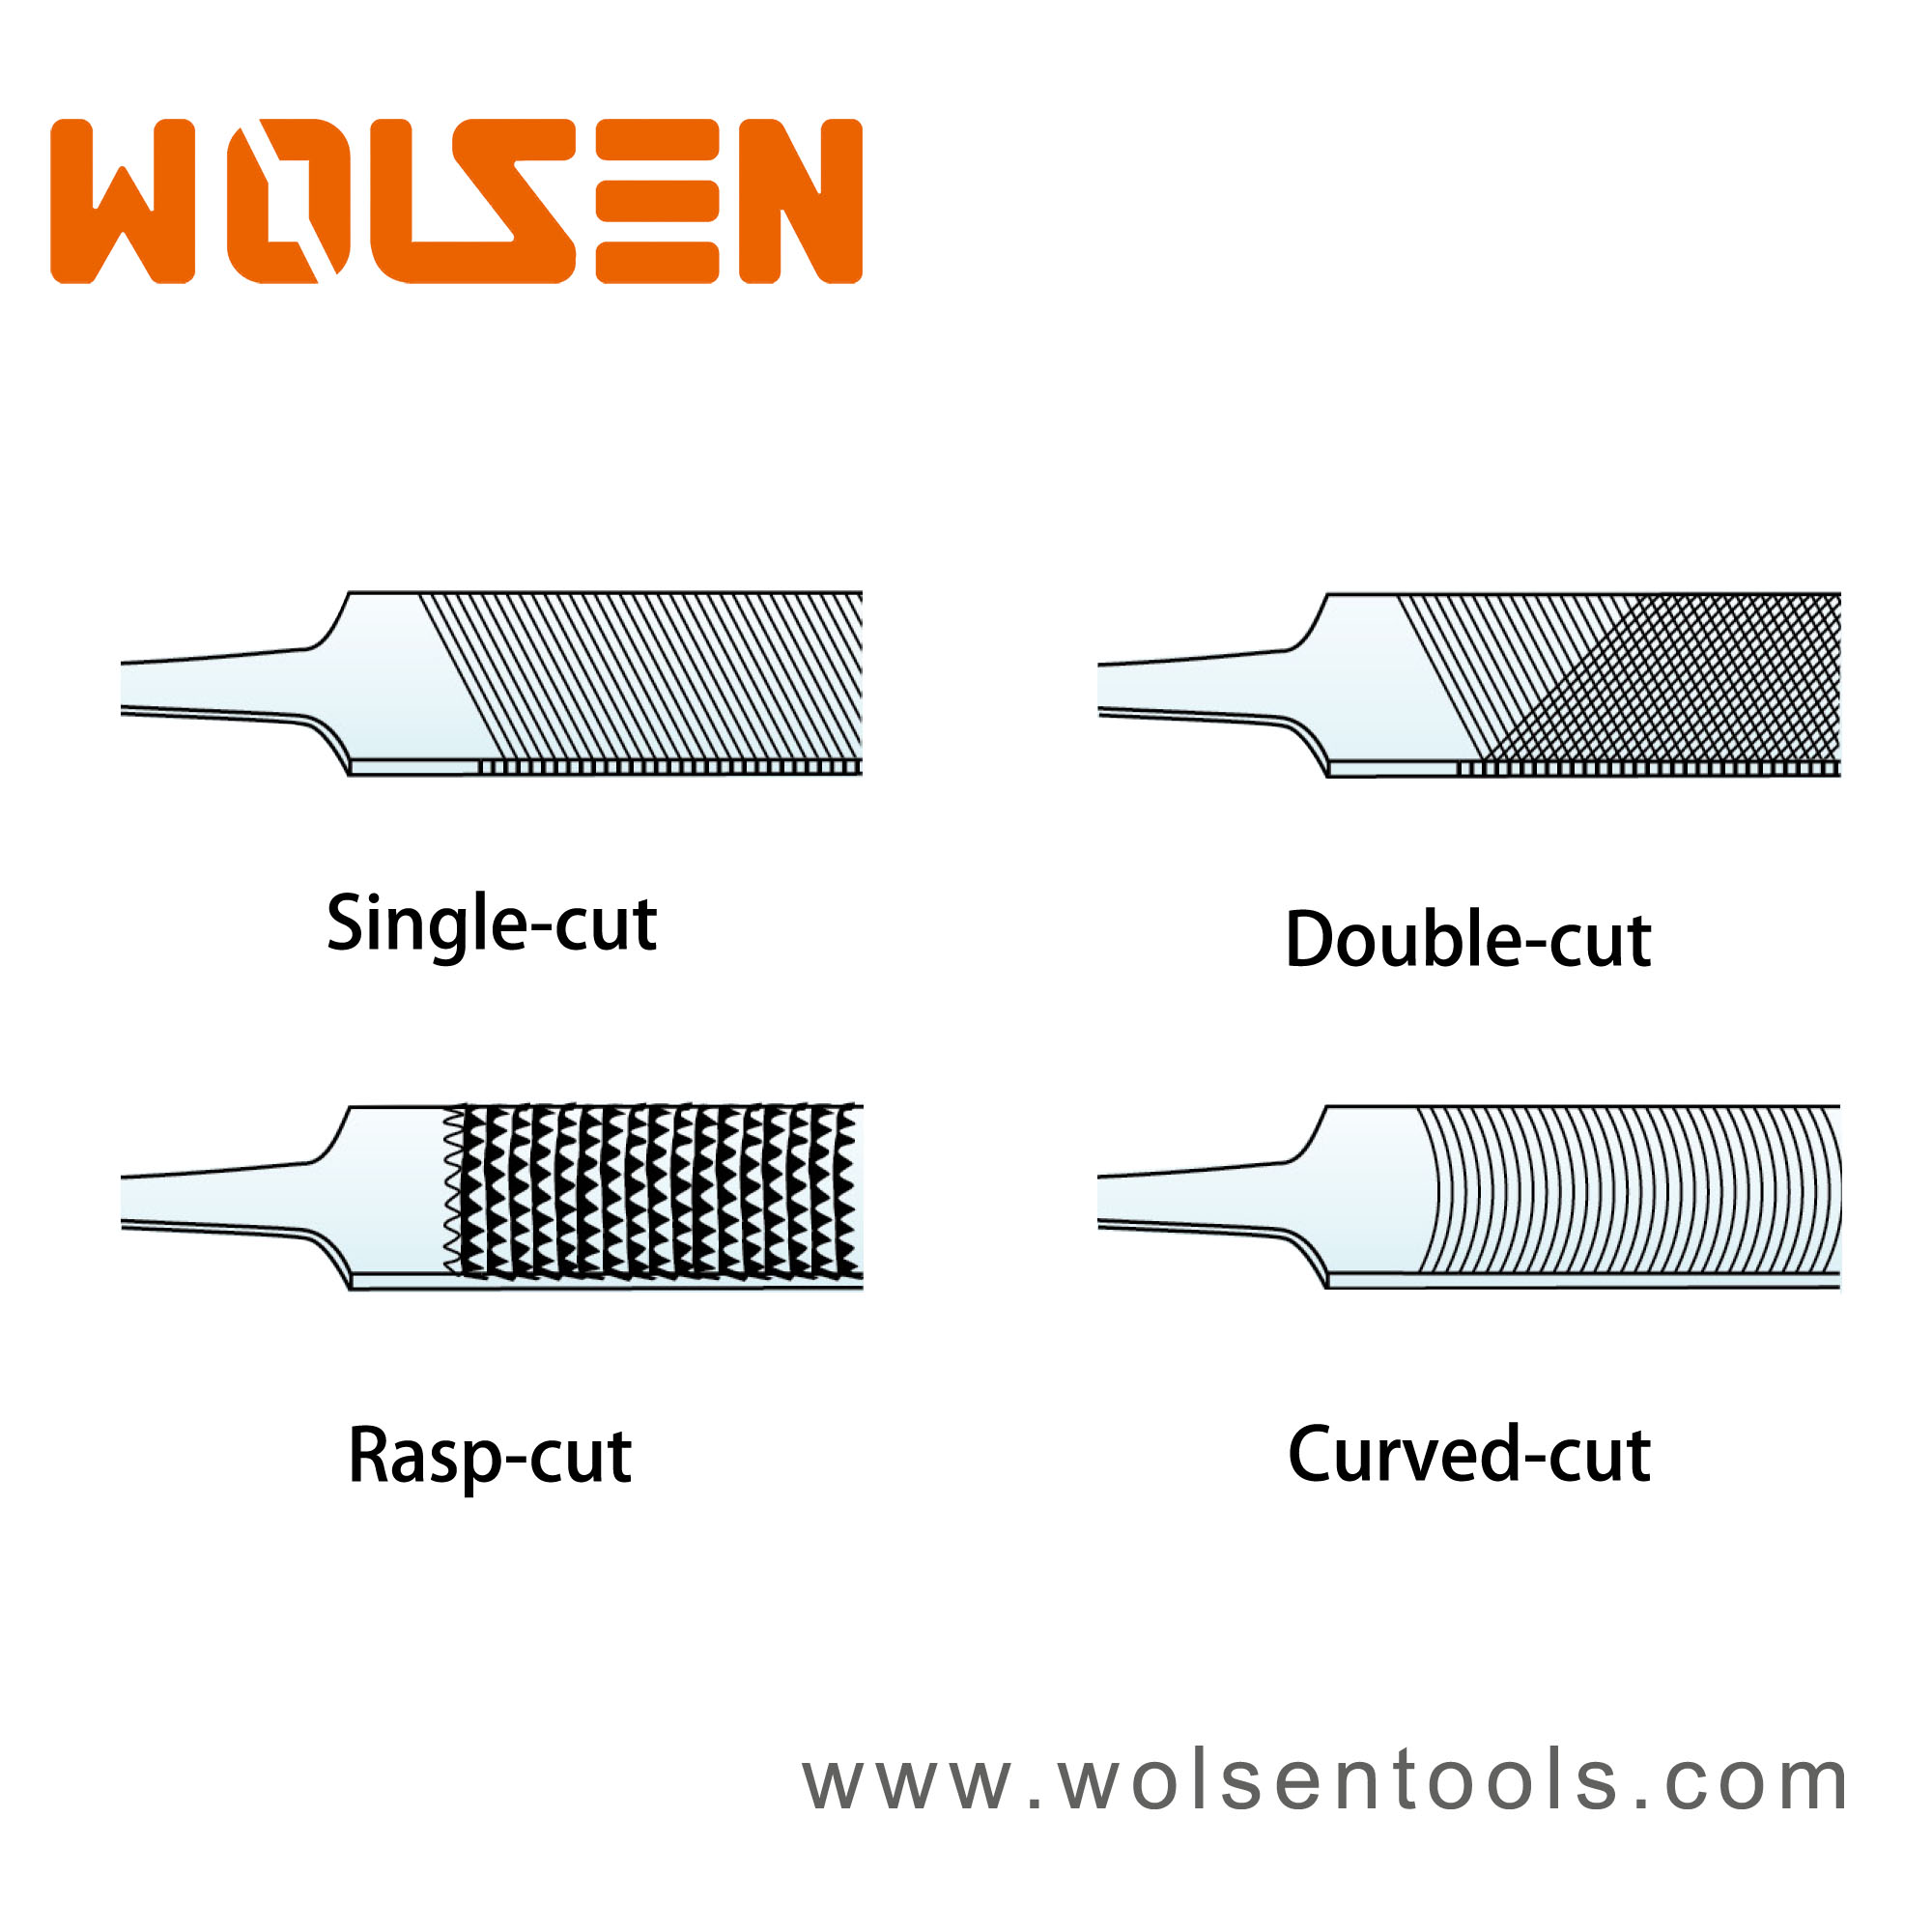
Metal File’s Kinds of Teeth
Single-cut
- Single set of parallel, diagonal rows of teeth.
- Single-cut files are often used with light pressure to produce a smooth surface finish or to put a keen edge on knives, shears or saws.
Double-cut
- 2 sets of diagonal rows of teeth.
- Second set of teeth cut in opposite diagonal direction and on top of the first set.
- Fist set of teeth is known as the overcut, second is known as upcut.
- Upcut is finer than overcut.
- Double -cut file is used with heavier pressure than the single-cut and removes material faster from the workpiece.
Rasp-cut
- Series of individual teeth which are formed by a single-pointed tool
- Produces an rough cut that is used primarily on wood, hooves, aluminum and lead.
Curved-cut
- Teeth arranged in curved contours across the file face.
- Curved-cut file is normally used in automotive body shops for smoothing body panels.
How to File Metal
Metal files are relatively inexpensive and effective tools for reshaping and smoothing metal and hard plastics, offering the potential for high precision and many years of trouble-free use. Be sure to select the right kind of file for the job, and keep it clean and oiled. You can straight file, cross file, or draw file, depending on whether you want to remove material, do detail work, or create a smooth surface.
Part 1: Choosing and Preparing Your File
1 Select a file size.
In general, large files are relatively coarse. They leave a rougher finish, but remove more stock. Conversely, smaller files are finer. They remove less stock, but leave a smoother finish.
2 Choose a file shape.
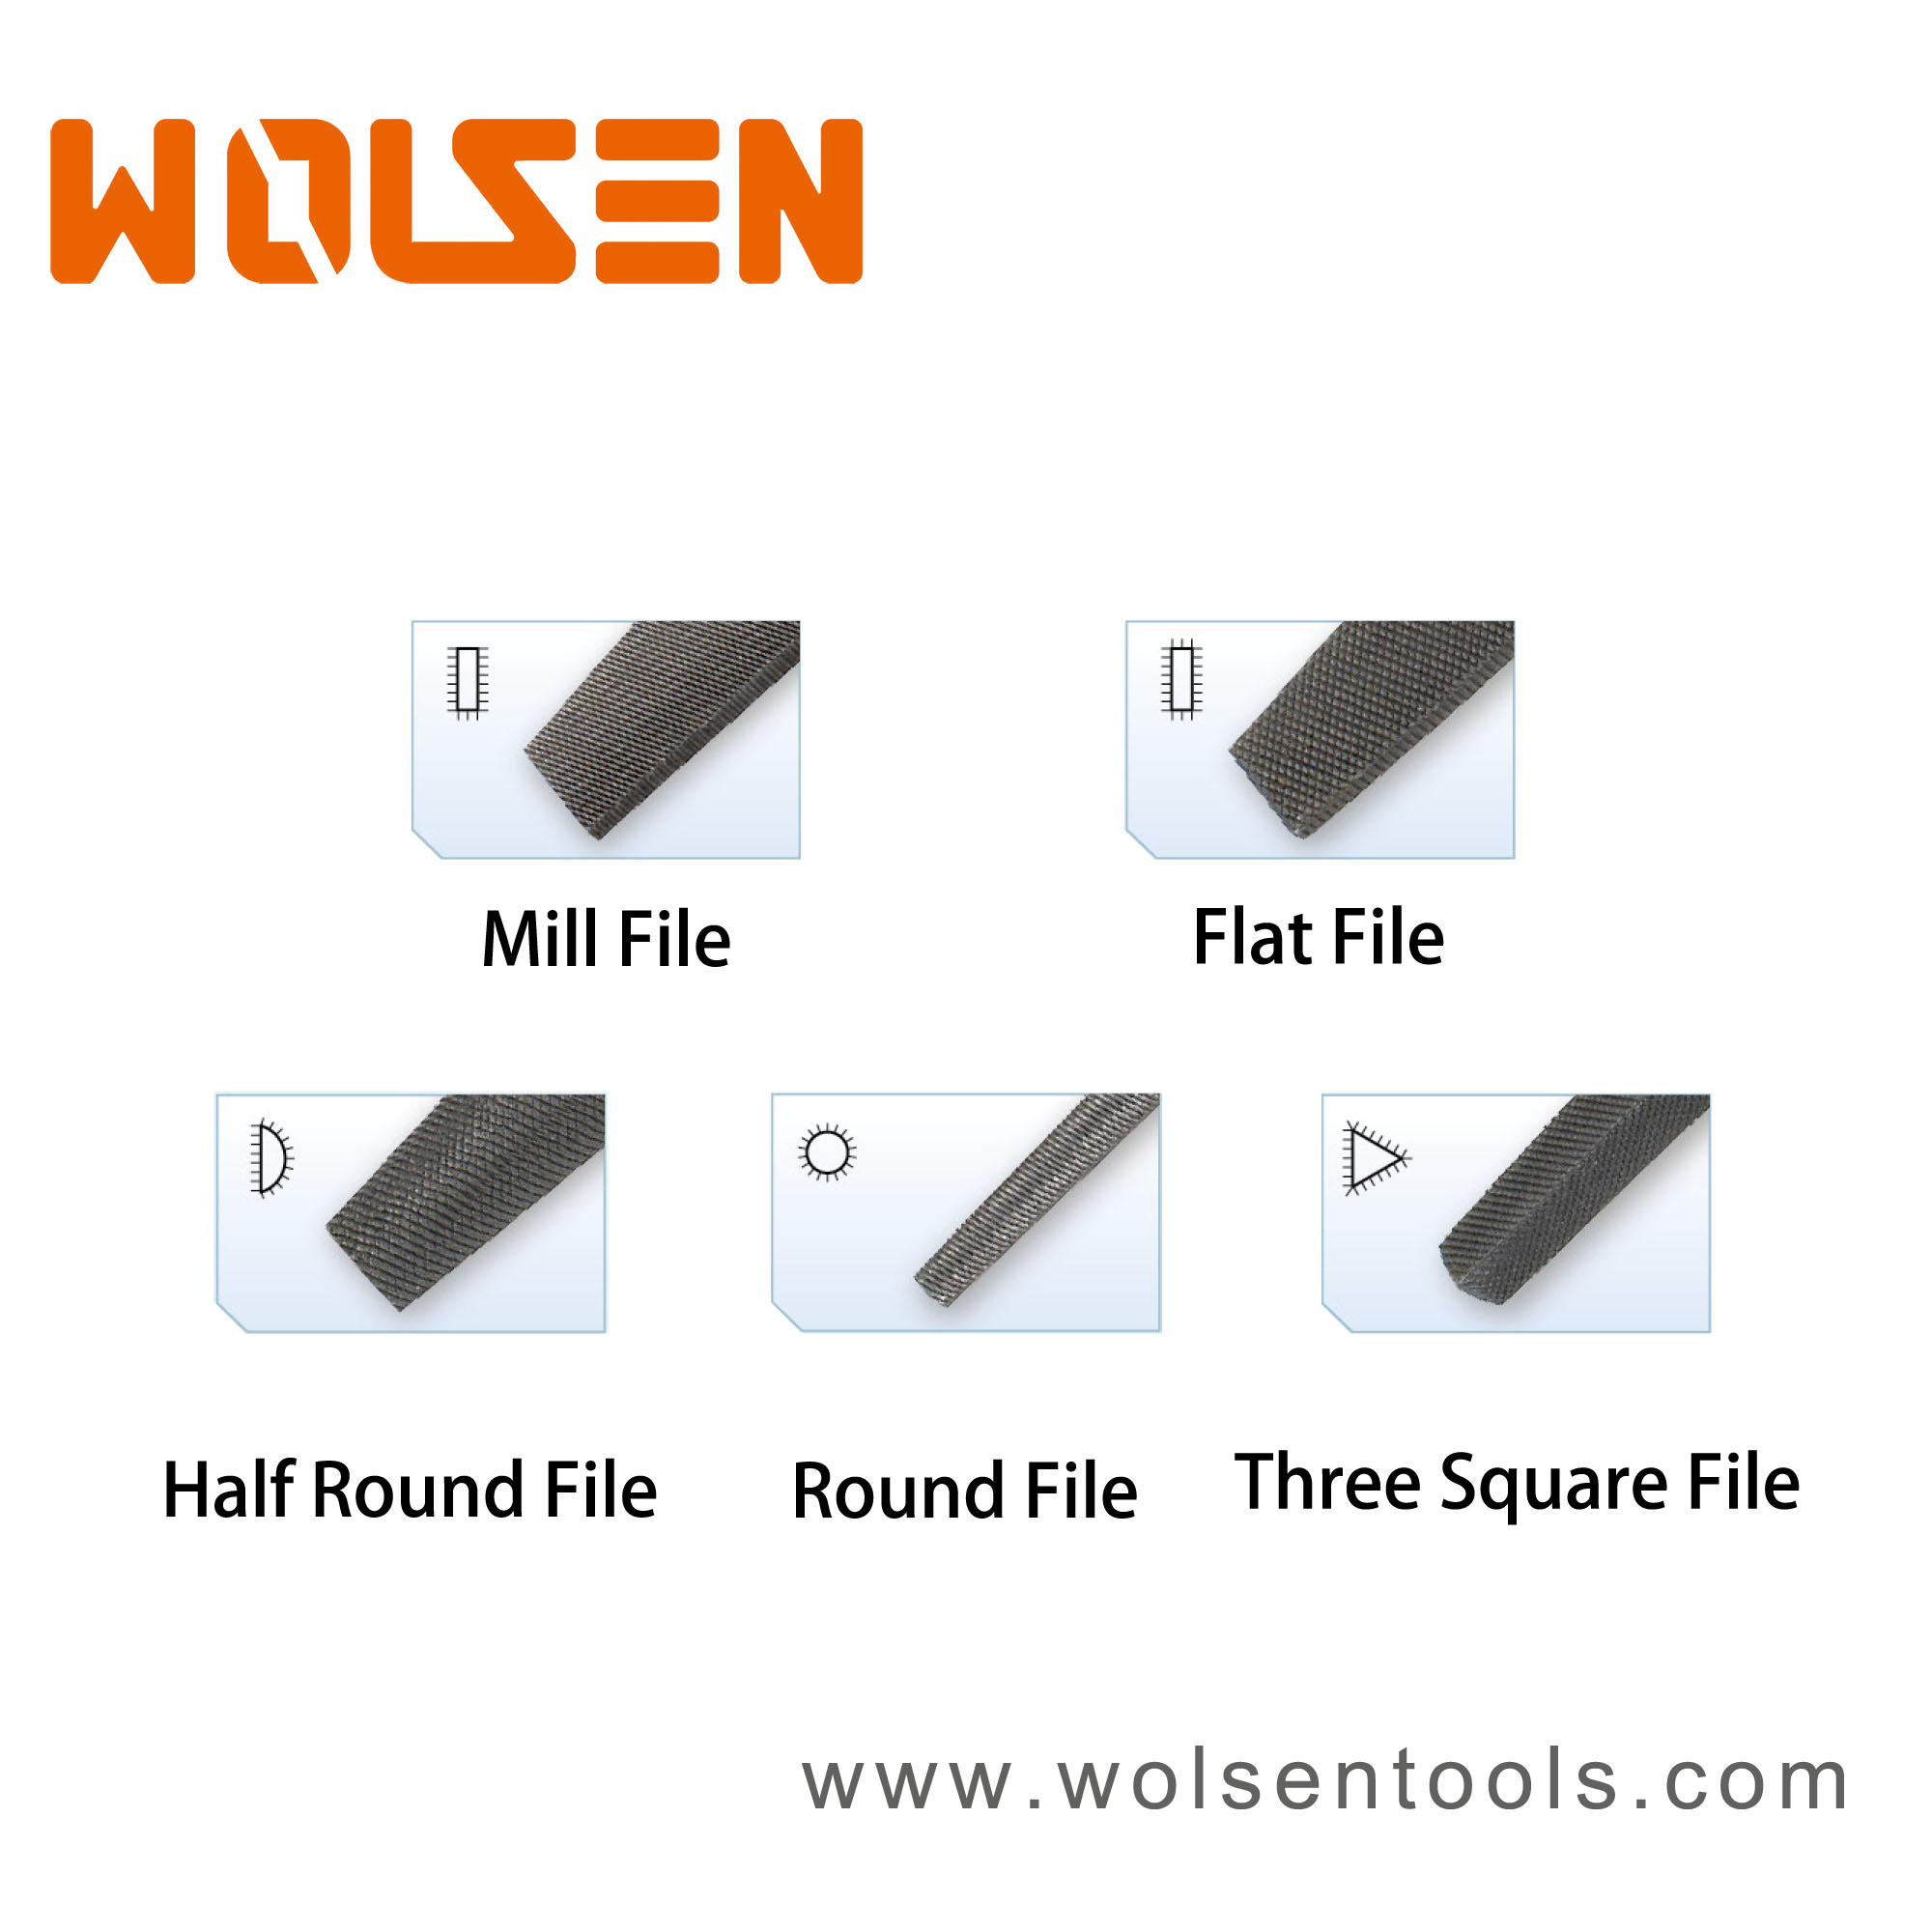
Use a flat file for general purpose work, a square file for enlarging rectangular holes, and a round file for enlarging round holes. Use a triangular file on acute angles, and a half-round file to smooth curved faces of grooves.
3 Determine the degree of coarseness needed.
A bastard-cut file has the highest degree of coarseness, while a second-cut file has a medium degree of coarseness. A smooth-cut file is the least coarse option.
4 Pick the right tooth geometry.
For fast removal of stock, choose a double-cut file. For finishing, use a single-cut file. Choose a rasp-cut for rough cuts of soft materials, and a curved-cut file for automotive body work.
- Use a double-cut file to file brass, bronze, copper, and tin. These tough metals should be filed with a double-cut file as they are strong enough to withstand the metal and/or alloy.
- Rasp-cut files can be used for wood as well as lead and aluminum. This file has a series of individual teeth and produces a rough cut.
5 Check the quality of the file.
Be sure that the file you choose to use is whole, rather than broken or chipped. Ensure the handle is intact and not loose. Check the teeth to be sure they aren’t broken, and look for rust, which should be removed before using the file.
- Soak your file in distilled white vinegar overnight to remove the rust. Then wipe off any residue and thoroughly dry the file before using it.
6 Clean the file.
There should not be any pins (bits of filed metal) stuck in the teeth. If there are, clean them out with a file card, stiff wire brush, or a piece of skinny wire or sheet metal. You can also use a scrap piece of hardwood to clean your file by pressing the wood against the file and scraping it along the grooves.
- You should clean your file often while you are working as well. Aim to stop and clean your file every 15 strokes or so to prevent pinning.
7 Apply chalk, oil, or lard to the file.
Liberally rub chalk, or a small amount of lard or general-purpose oil, into the teeth of the file. This makes the file less likely to become clogged with pins in the future, as well as reduces the amount of metal dust when filing, and also protects the file.
- You may want to wear gloves when applying chalk, oil, or lard to your file to keep your hands clean.
Part 2: Using the Right Filing Technique
1 Secure your work.
It is important to secure your work with a vise or other clamp to keep it from moving around while you are filing. Mount the vise so that the stationary jaw extends slightly beyond the edge of your workbench, and be sure to place bolts in all the holes on the base of the vise and secure them with locking washers. Then, place the workpiece in the vise so that it is supported by the full clamping surface.
2 File in only one direction.
You don’t want to use a back and forth motion with your file, as this will damage the file and likely your workpiece as well. Instead, only apply pressure on the forward stroke and lift the file away from the workpiece on the return stroke.
3 Cross file to remove material.
For heavy cross filing, grab the handle of the file with the dominant hand and place the palm of the other hand on the end of the file. Angle the file diagonally to the work and press down firmly so that the file digs in and cuts the metal. Make long, slow strokes away from your body. Lift the file away from the surface on the return stroke to prevent dulling the file.
4 Straight file for detail work.
For straight filing, use a small file rather than a large one. Grab the handle of the file with the dominant hand and place the fingers of the other hand on the end of the file. Point the file away from you and press it down firmly on your workpiece. Make long, slow strokes away from your body, and only file in one direction, rather than back and forth.
5 Draw file to finish a surface.
For draw filing, place your hands on either side of the file with a gap slightly larger than your workpiece. Hold the file horizontally and make long, slow strokes away from your body with a firm pressure. Remember to only apply pressure on the forward stroke, and to remove the file on the backward stroke.
- If filing cast iron, be sure to knock the scale off first! It is very hard and will quickly ruin a file.